Create Simple Summer Sash, with this Free Scarf, Choker or Belt Crochet Pattern
- Joanne

- Oct 19, 2025
- 8 min read

This post contains both affiliate links and non-affiliate links. Read about how I use affiliate links here.
Create a quick, easy and versatile accessory from this Free Scarf, Choker or Belt Crochet Pattern that can be worn in so many different ways to complement your favourite outfits. Don't be discouraged from making it in other seasons too: it's an all season design named for the optional flower pendants and appliqués. In fact, it's just as handy for keeping your hair neat in Autumn, as a choker to go with a strappy spring top or a belt to spruce up a cosy cable knit dress in Winter. It would be such a handy thing to have with you on your travels if you're planning a trip soon and could even make a fun, compact travel project if you haven't time to make it beforehand.
Work up the pattern in aran/worsted yarn for a soft belt/scarf/hairband or in thread for a sweet choker. Add flowers, tassels or leave it plain ; the choice is yours!
If you prefer reading your pattern from a document rather than online, this pattern is also available as an ad-free printable pdf pattern on Ravelry.

Why make the Simple Summer Sash from this Free Scarf, Choker and Belt Crochet Pattern?

It's a great way to boost your accessory collection at little cost and fantastic for using up thread or yarn scraps leftover from other yarncraft or embroidery projects.
The pattern is very versatile, allowing you to experiment with different length, colour and style options to create accessories to match your personal style and favourite outfits. You could even add tassels to the ends or little flowers along the length. I've added instructions for those too.
Before you start:

In the photo: Studio Flax linen thread
Width: dependent on thread/yarn and hook size
Length: continue to desired length
Tension:
- 25 sts and 12 rs = 10cm / 4” measured over main section using #10 thread and1.25 mm hook, after blocking.
- 14 sts and 5 rs = 10cm / 4” measured over main section using aran/worsted yarn and 4.5 mm/G hook, after blocking.
Working method: Sash is made from end to end, worked flat in turned rows; flower is worked in the round.
Finished measurements
Linen Thread, e.g. Studio Flax Linen thread is used in the sample
a. width: 2 cm / 3/4”
b. flower diameter: 2.5 cm / 1”
Aran/Worsted Yarn, e.g. Lily's Sugar 'n Cream yarn in Black Currant is used in the sample
a. width: 5 cm / 2”
b. flower diameter: 6 cm / 2 1/41”
Requirements
A non stretchy plant fibre yarn or thread, such as linen or cotton, although silk would also work well, and trying the hook size suggested on the yarn band, adjusting if needed to give the look and width you want for your band.
Needle and scissors
1 stitch marker if working a piece that requires a length of chains at the start to tie it to the other end
Optional, some contrast colour scraps of about 2-3 m/yds for any flowers you want to add and/or contrast colour scraps of about 15cm/6" for tassels.
Abbreviations, Charts, Key and Special Stitches
st/sts stitch/stitches
R round or row
RS/WS right/wrong side
ch chain (0)
dc double crochet (US terms only)
tr treble
dtr double treble (UK terms)
2tog work first half of the named stitch in each stitch indicated in pattern, yarn over hook and pull through all loops on hook
chsp chain space
Pattern Notes
This pattern provides both UK terminology and a US terminology versions. Please be sure you are using the section with your preferred terminology. I recommend that you read through the pattern before starting.
Method UK Terms Switch to US Terms
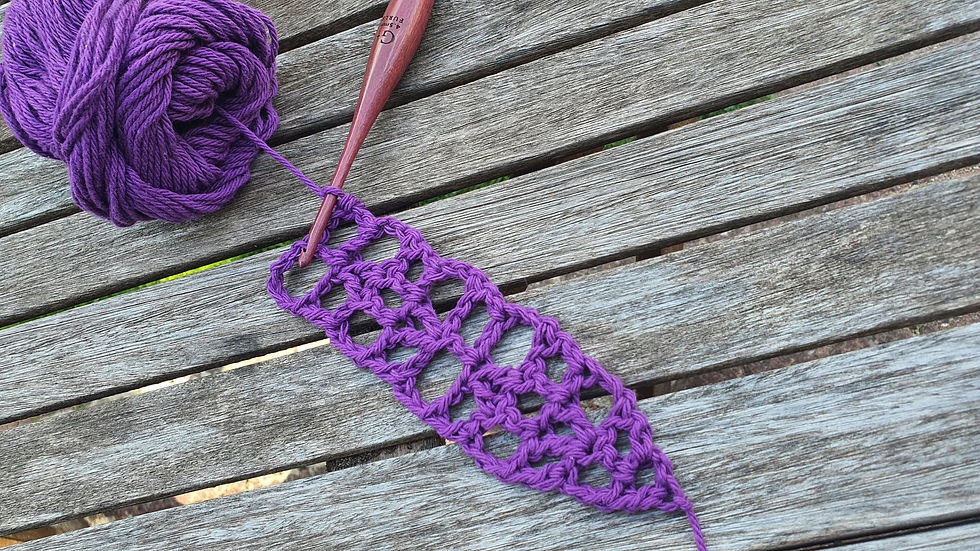
In the photo: Furls Purpleheart Streamline Wood Crochet Hook; Lily's Sugar 'n Cream yarn in Black Currant
MAIN SECTION
Worked flat, turning at end of each row.
If you are working a piece that requires ties to be worked at each end, start by working15cm/6" of chains and mark the last one with a stitch marker to remind you where you're starting the main piece.
Start Taper
R1: With MC, 4 ch (counts as 1 tr, 1 ch throughout this section), 1 tr in 4th ch from hook, turn. 2 sts; 1 1chsp
R2: 4 ch, 1 tr in chsp, 1 ch, 1 tr in 1st st (i.e. 3rd ch) of R1, turn. 3 sts; 2 1chsp
R3: 4 ch, miss 1chsp, (1 tr, 1 ch, 1 tr) in centre st, 1 ch, miss 1chsp, 1 tr in 1st st (i.e. 3rd ch) of R2, turn. 4 sts; 3 1chsp
Straight Section
R1: 4 ch, miss 1chsp, 1 tr, 1 ch, miss 1chsp, 1 tr, 1 ch, miss 1chsp, 1 tr in 1st st (i.e. 3rd ch) of previous row, turn. 4 sts; 3 1chsp
R2: 5 ch, miss 1chsp, tr2tog in two tr either side of central 1chsp, 2 ch, miss 1chsp, 1 tr in 1st st (i.e. 3rd ch) of previous row, turn. 3 sts; 2 2chsp.
R3: 5 ch, miss 2chsp, 1 tr in tr2tog, 2 ch, miss 2chsp, 1 tr in 1st st (i.e. 3rd ch) of previous row, turn. 3 sts; 2 2chsp.
R4: 4 ch, miss 2chsp, (1 tr, 1 ch, 1 tr) in centre st, 1 ch, miss 2chsp, 1 tr in 1st st (i.e. 3rd ch) of previous row, turn. 4 sts; 3 1chsp
Rep R1-R4 until piece is 4 rows short of desired length and R1 once more.
End Taper
R1: 4 ch, miss 1chsp, tr2tog in two tr either side of central 1chsp, 1 ch, miss 1chsp, 1 tr in 1st st (i.e. 3rd ch) of previous row, turn. 3 sts; 2 1chsp.
R2: 3 ch, miss 1chsp, 1 tr in tr2tog, miss 1chsp, 1 tr in 1st st (i.e. 3rd ch) of previous row, turn. 3 sts.
R3: 2 ch, miss 1 st, 1 tr in 1st st (i.e. 3rd ch) of previous row, turn. 1 st
If you are working a piece that requires ties to be worked at each end, work 15cm/6" of chains.
Fasten off.
Edging

Working around all of main section excluding optional ties, work 3 slst through each row end stitch to give a firm, neat edge.
FLOWER

Worked in the round.
For a flower to suspend from the sash rather than to sew onto it, start by working chains to the length you want it suspended by and mark the final chain with a with a stitch marker. I worked 10 ch for the central white flower on the choker shown in the photos.
With CC, chain 4, slst in first ch to form a ring, leaving a 15cm/6” end for seaming.
R1: Working into ring, [3 ch, 3 dtr in ring, 3 ch, slst in ring] 5 times. 5 petals (5 sts each)
Fasten off.
Method US Terms Switch to UK Terms

MAIN SECTION
Worked flat, turning at end of each row.
If you are working a piece that requires ties to be worked at each end, start by working15cm/6" of chains and mark the last one with a stitch marker to remind you where you're starting the main piece.
Start Taper
R1: With MC, 4 ch (counts as 1 dc, 1 ch throughout this section), 1 dcin 4th ch from hook, turn. 2 sts; 1 1chsp
R2: 4 ch, 1 dc in chsp, 1 ch, 1 dc in 1st st (i.e. 3rd ch) of R1, turn. 3 sts; 2 1chsp
R3: 4 ch, miss 1chsp, (1 dc, 1 ch, 1 dc) in centre st, 1 ch, miss 1chsp, 1 dc in 1st st (i.e. 3rd ch) of R2, turn. 4 sts; 3 1chsp
Straight Section
R1: 4 ch, miss 1chsp, 1 dc, 1 ch, miss 1chsp, 1 dc, 1 ch, miss 1chsp, 1 dc in 1st st (i.e. 3rd ch) of previous row, turn. 4 sts; 3 1chsp
R2: 5 ch, miss 1chsp, dc2tog in two dc either side of central 1chsp, 2 ch, miss 1chsp, 1 dc in 1st st (i.e. 3rd ch) of previous row, turn. 3 sts; 2 2chsp.
R3: 5 ch, miss 2chsp, 1 dc in dc2tog, 2 ch, miss 2chsp, 1 dc in 1st st (i.e. 3rd ch) of previous row, turn. 3 sts; 2 2chsp.
R4: 4 ch, miss 2chsp, (1 dc, 1 ch, 1 dc) in centre st, 1 ch, miss 2chsp, 1 dc in 1st st (i.e. 3rd ch) of previous row, turn. 4 sts; 3 1chsp
Rep R1-R4 until piece is 4 rows short of desired length and R1 once more.
End Taper
R1: 4 ch, miss 1chsp, dc2tog in two dc either side of central 1chsp, 1 ch, miss 1chsp, 1 dc in 1st st (i.e. 3rd ch) of previous row, turn. 3 sts; 2 1chsp.
R2: 3 ch, miss 1chsp, 1 dc in dc2tog, miss 1chsp, 1 dc in 1st st (i.e. 3rd ch) of previous row, turn. 3 sts.
R3: 2 ch, miss 1 st, 1 dc in 1st st (i.e. 3rd ch) of previous row, turn. 1 st
If you are working a piece that requires ties to be worked at each end, work 15cm/6" of chains.
Fasten off.
Edging
Working around all of main section excluding optional ties, work 3 slst in each row end stitch to give a firm, neat edge.
FLOWER
Worked in the round.
For a flower to suspend from the sash rather than to sew onto it, start by working chains to the length you want it suspended by and mark the final ch with a with a stitch marker. I worked 10 ch for the central white flower on the choker shown in the photos.
With CC chain 4, slst in first ch to form a ring, leaving a 15cm/6” end for seaming.
R1: Working into ring [3 ch, 3 tr in ring, 3 ch, slst in ring] 5 times. 5 petals (5 sts each)
Fasten off.
Finishing
Tassel

With mc, wrap thread 20 times around a piece of card 7.5cm/3" in length and cut thread. Placing top of loop on waste yarn or stitch marker, remove loop from card.
or
With scraps, lay twenty15cm/6" pieces flat, place waste yarn or stitch marker around centre and fold in half at this point, which becomes top of tassel.
Assembly

Sew any tassels and flowers in place and optionally add a small bead at centre front of each flower.
Weave in ends and block to shape, using starch if desired, following product manufacturer’s instructions.
Make it your own

Make use of the length variations flower and tassel options included to create different types of item, e.g. make it to fit your hat as a band, as a bracelet or as a shoulder strap for a bag or even as a reusable gift ribbon.
Experiment with different weights, textures and colours of yarn.
Work start taper, one repeat and the extra row 1 and end taper to create an earring drop to match or make my Flora Drop Earrings to match the flower appliqués.
Remember that you’ll need to allow extra yarn for some changes.
How did it go?

I love to hear from anyone who uses one of my patterns to create a project. Any feedback you give about the pattern will help me develop future patterns that are easy to follow and it’s always exciting to see in-progress or finished projects created using my patterns. Adding a photo to your Ravelry project page linked to this pattern lets me see what you're making and will really help other people who are considering making it or use #simplesummersash on Instagram and don't forget to tag @madewithloveandfibres in your post or caption!


Comments